DIY Bar Table - IKEA KALLAX HACK
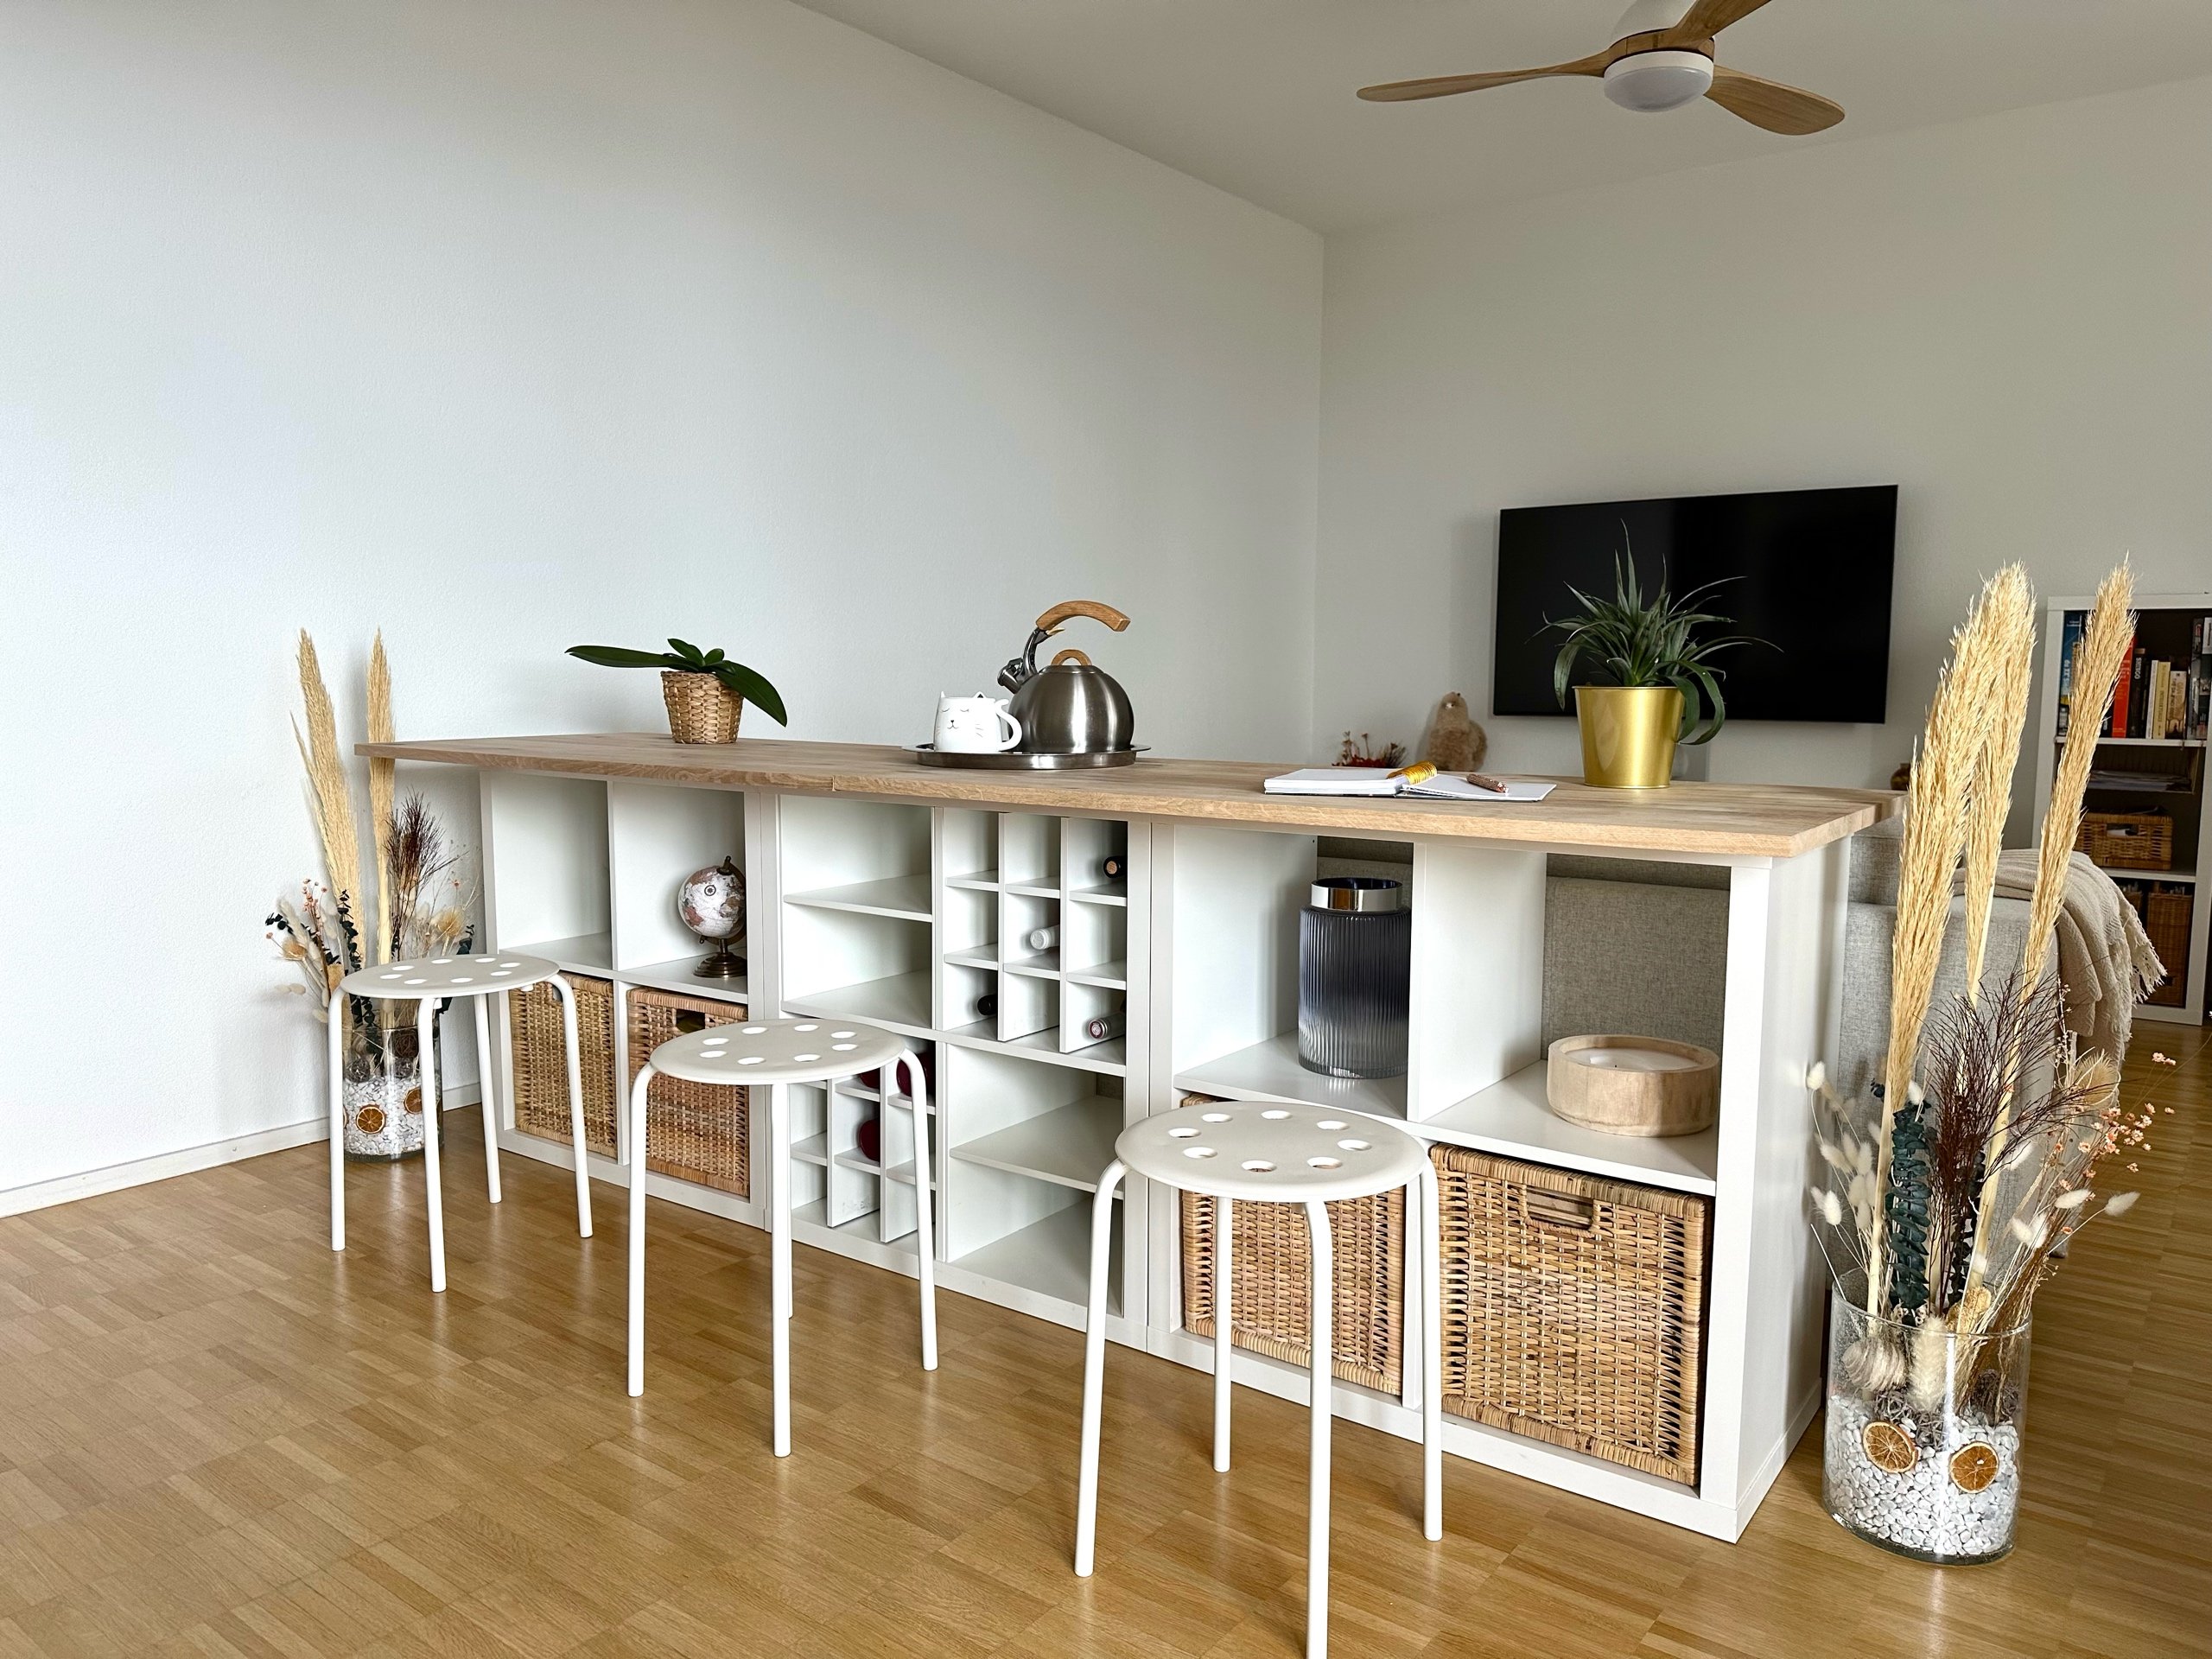
Transform your space with this clever IKEA hack! Discover how to convert the versatile KALLAX shelves into a stylish coffee station or bar table. This DIY project combines functionality with a modern aesthetic, offering a chic solution for coffee lovers and home entertainers alike. Elevate your home décor with this innovative and practical transformation!
Materials Needed
To transform the KALLAX shelves into a chic bar table, you'll need the following items:
- 3 Square KALLAX Units (77x77 cm each) - These form the main structure of your coffee station.
- 2 Inserts with One Shelf - These provide additional storage space within the KALLAX units.
- 2 Inserts for Bottles - Perfect for organizing wine or other bottles neatly.
- 4 BRANÄS Baskets - Ideal for storing coffee supplies, bar tools, or other accessories.
- 1 Wooden Kitchen Countertop (246 cm, color of your choice) - This serves as the tabletop for the bar.
- 3 MARIUS Stools - Comfortable seating to complement your new setup. With optional chair pads.
The Process
Step-by-Step Process to Transform KALLAX Shelves into a Bar Table. Follow these easy instructions and you will enjoy your new coffee station in no time! Let's start!
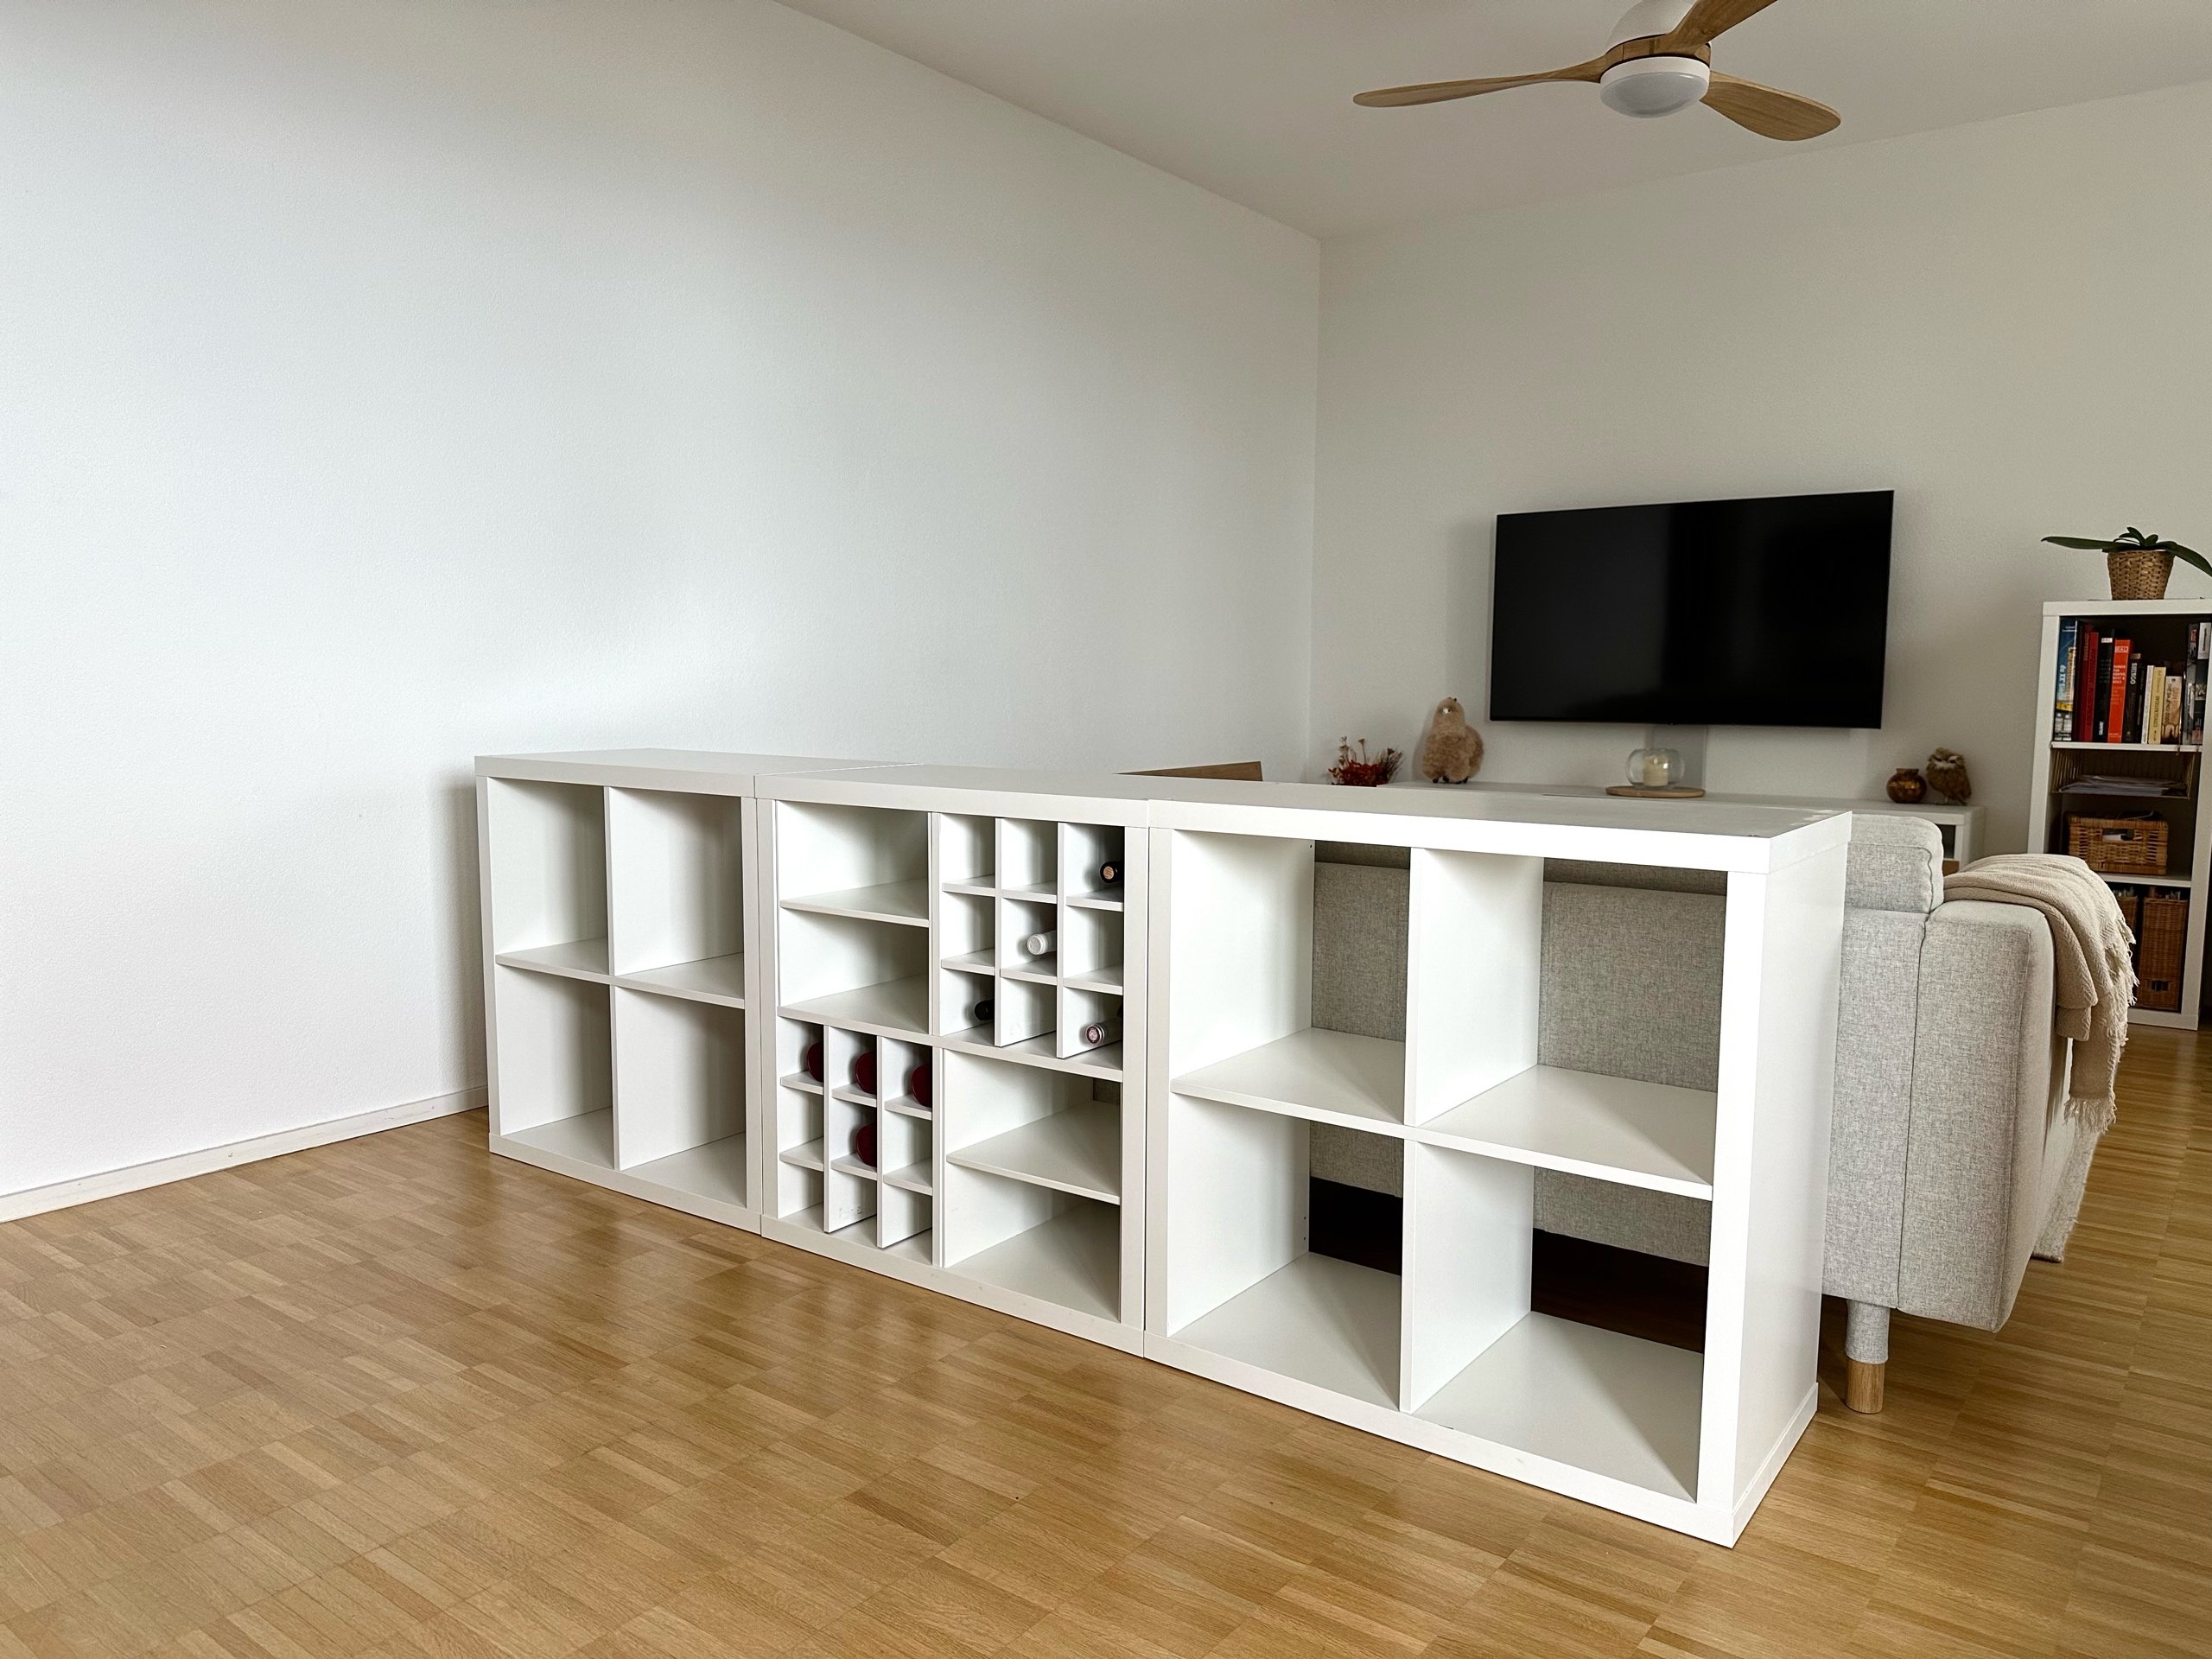
Step 1: Assemble the KALLAX Units
- Assemble the KALLAX Units according to the IKEA instructions. You will have three square units, each measuring 77x77 cm.
- Arrange the Units side by side, ensuring they are aligned properly. This will form the base structure of your coffee station or bar table.
- Connect the units - this will ensure better stability of the table.
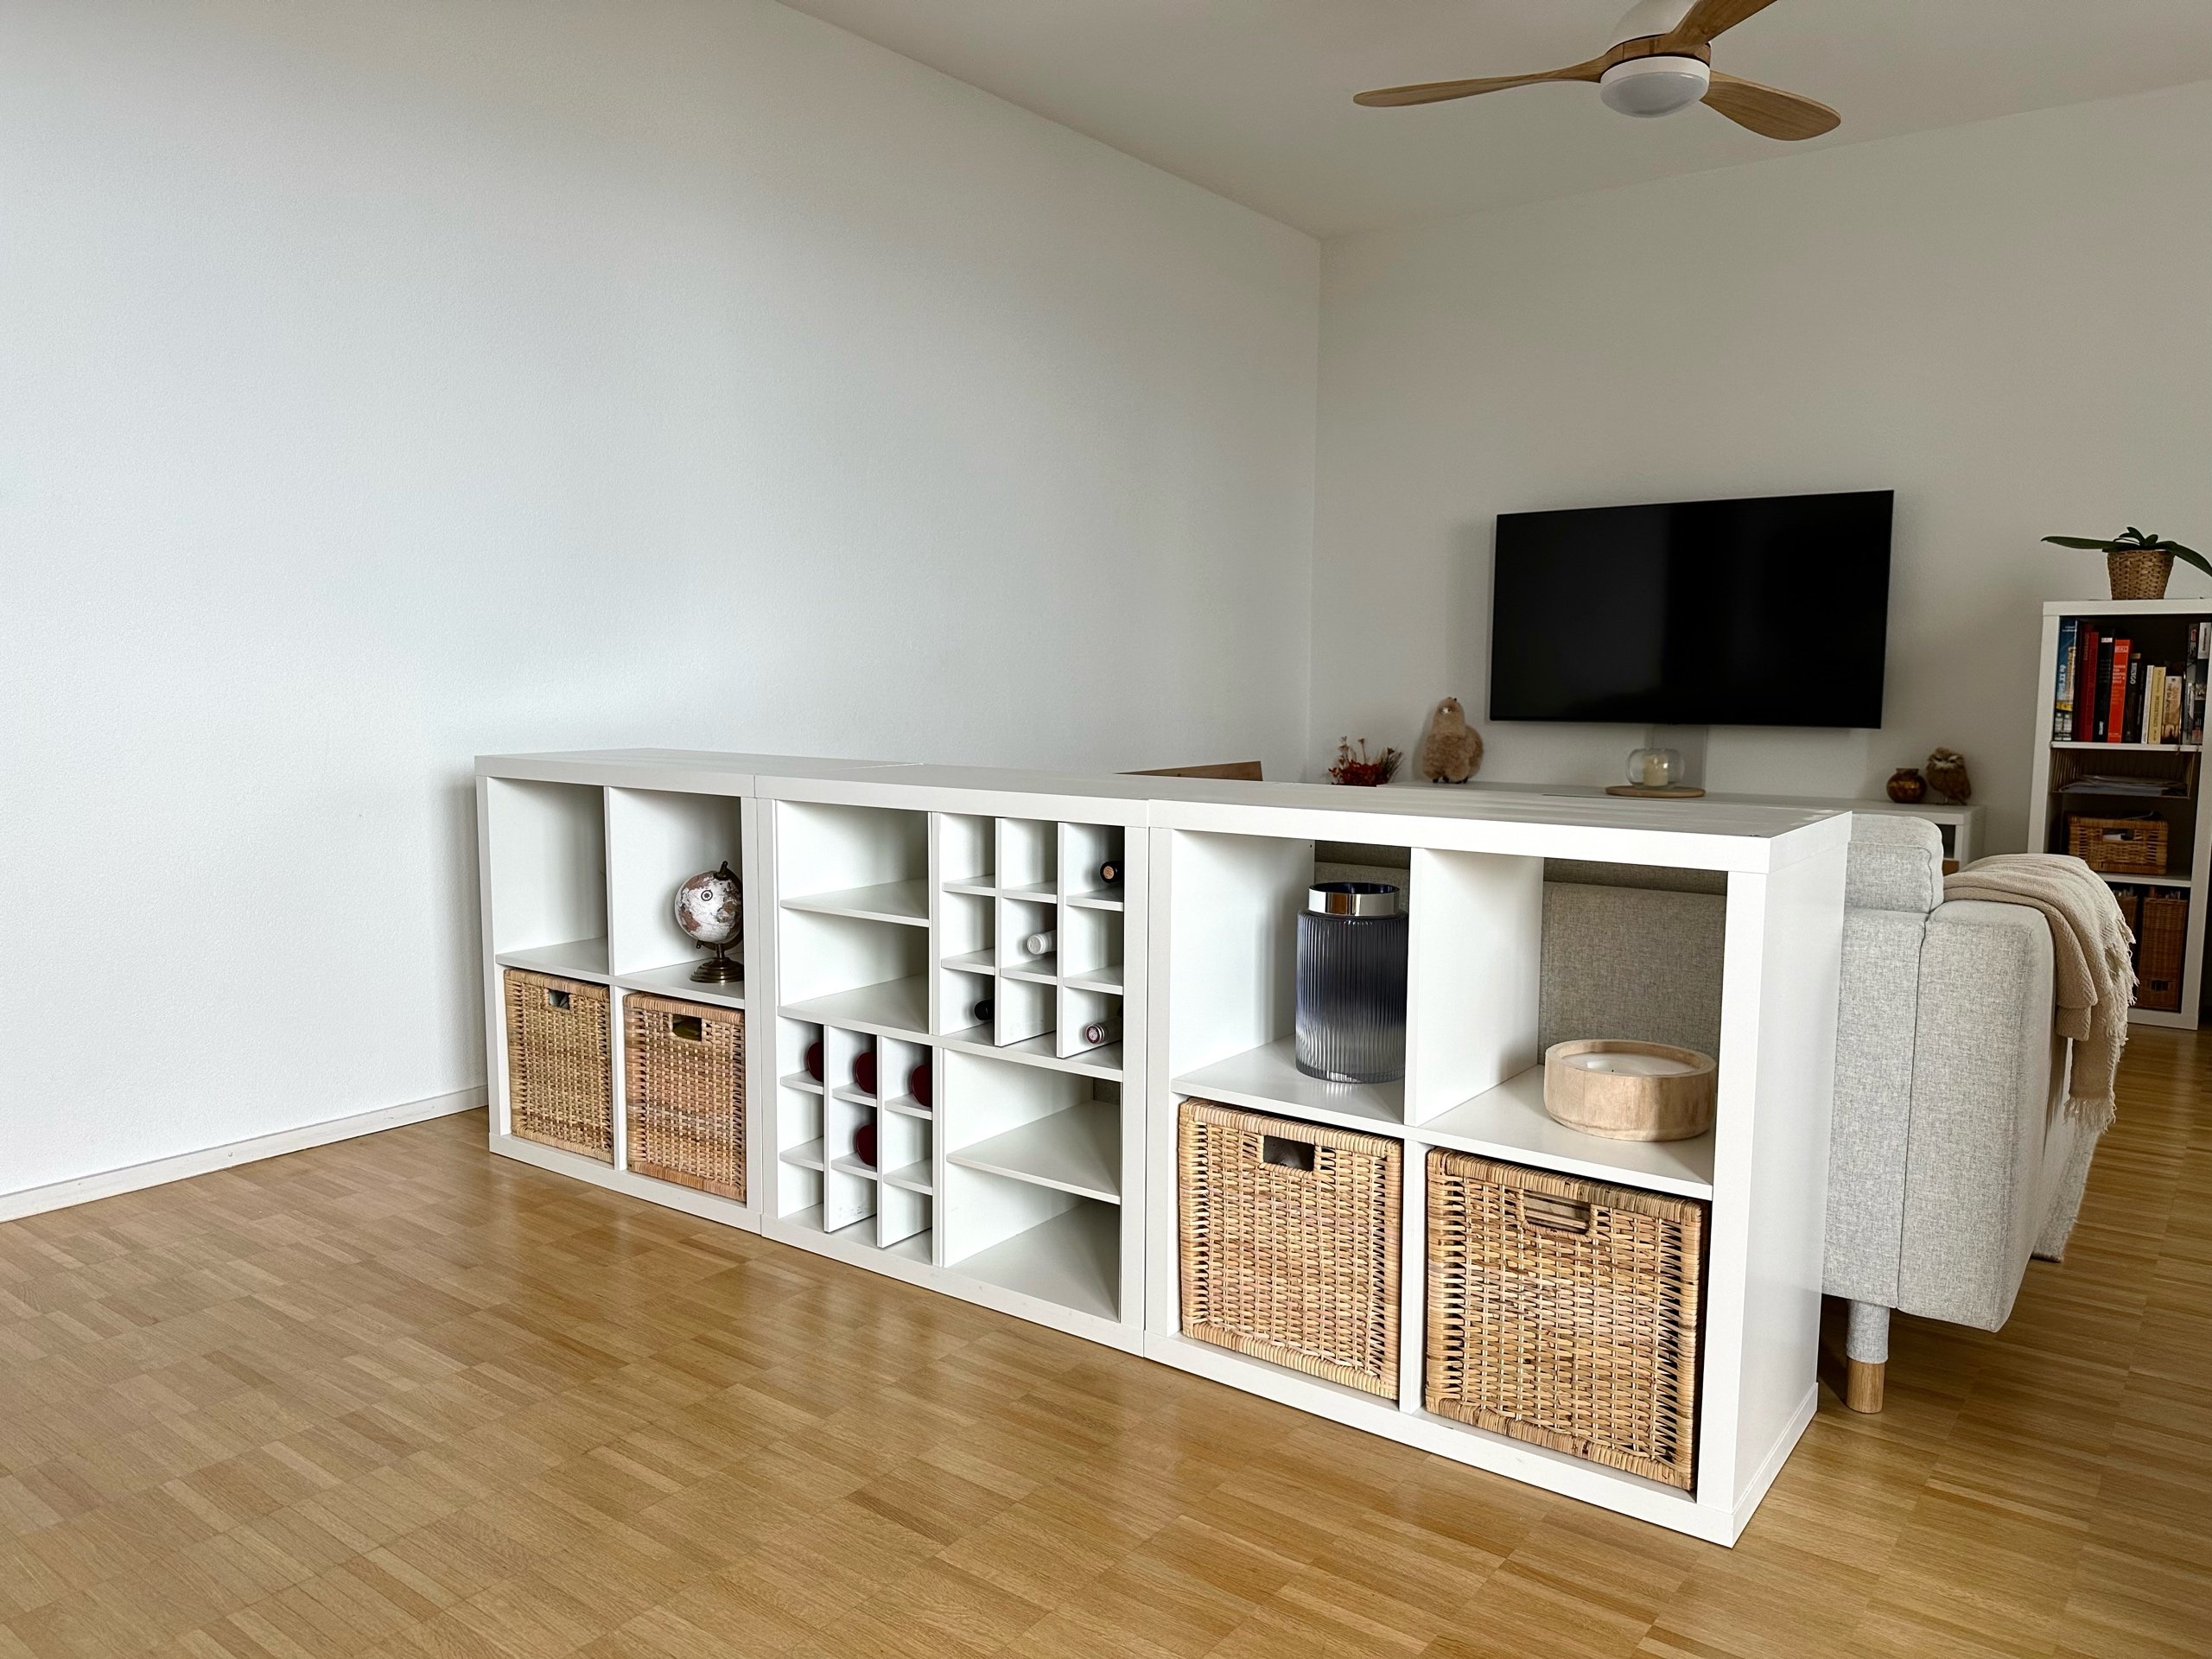
Step 2: Add the Inserts
- Install the Inserts with One Shelf into two of the KALLAX units. These inserts will provide additional storage for mugs, glasses, or other items.
- Install the Inserts for Bottles into the third KALLAX unit. These inserts are designed to hold wine bottles or other beverages securely.
Step 3: Incorporate the Baskets
- Place the BRANÄS Baskets into the remaining compartments of the KALLAX units. These baskets are perfect for storing coffee supplies, bar tools, napkins, and other accessories.
Step 4: Prepare the Countertop
- Measure and Cut the Countertop (if necessary) to fit the combined width of the three KALLAX units. The pre-cut 246 cm countertop will cover the units almost perfectly, leaving around 7.5cm on each side - if you're bothered by this you can cut it to the exact measure. The standard width of the countertop is 60cm which leaves just enough space to sit comfortably.
- Sand the Edges of the countertop to smooth out any rough areas.
Step 5: Attach the Countertop
- Position the Countertop on top of the assembled KALLAX units. Ensure it is centered and overhangs evenly on all sides except for the back which needs to be in line with the units.
- Secure the Countertop to the KALLAX units using screws and brackets. Drill pilot holes through the KALLAX top panels and into the countertop, then attach with screws. Ensure the countertop is firmly attached. You can also glue it if you don't feel like drilling.
Step 6: Add the Finishing Touches
- Style the Bar Table by arranging your coffee maker, mugs, and other accessories on the countertop. For a bar table, add your favorite drinks, glasses, and bar tools.
- Decorate the Shelves and Baskets with coffee supplies, bottles, and other essentials. Organize them neatly for both aesthetics and functionality.
Step 7: Set Up the Seating
- Arrange the MARIUS Stools around the table. Place them at a comfortable distance apart, ensuring easy access to the coffee station or bar table.
Optional: Customize Your Setup
- Paint or Stain the KALLAX Units and Countertop to match your décor. Use paintbrushes or rollers for an even finish. Allow them to dry completely before reassembling.
- Add Lighting under the countertop or within the shelves to highlight your coffee station or bar table and create a cozy ambiance.
Final Touches
- Ensure Everything is Level using a level tool. Adjust if necessary to make sure the countertop and units are perfectly aligned.
- Clean the Space thoroughly to remove any dust or debris from the assembly process.
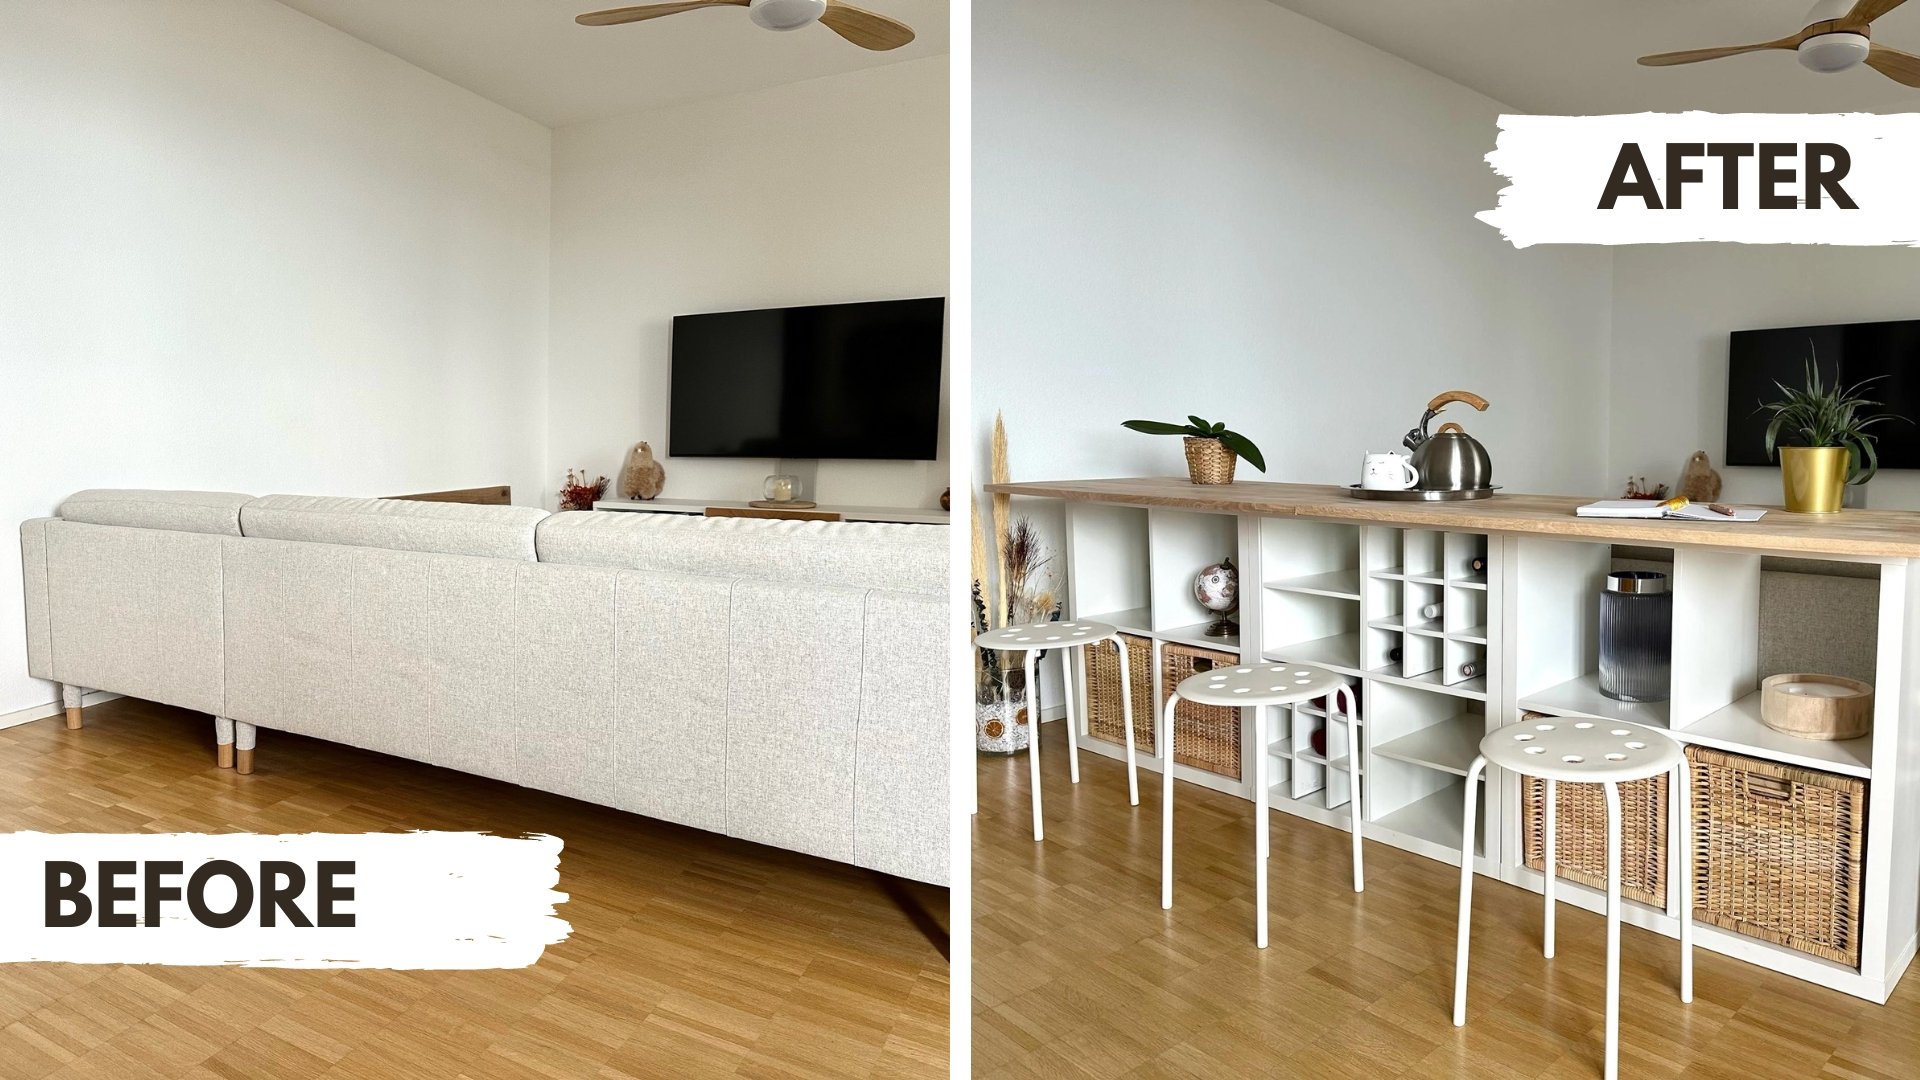
Now, your stylish and functional coffee station or bar table is ready to use! Enjoy your new setup, whether you're brewing a morning coffee or mixing evening cocktails. Tag me on Instagram if you try this hack @maselladesign!
Join our vibrant community of interior design enthusiasts! Subscribe to my newsletter and stay in the loop with the latest trends, expert tips, and exclusive content delivered straight to your inbox. Simply enter your email below and embark on a journey of design inspiration!
Thank you for subscribing!
Have a great day!